Millermatic 350P Manual: A Comprehensive Guide
This manual details the Millermatic 350P, covering installation, operation, and maintenance. It includes schematics (Z60/34), parts lists, and advanced techniques like aluminum push-pull welding.
The Millermatic 350P is a robust, industrial-grade MIG (Metal Inert Gas) welding power source and wire feeder package designed for a wide range of welding applications. This versatile machine excels at welding materials from 22 gauge up to ½ inch (12.7 mm) thick, making it suitable for both fabrication shops and on-site repairs.
This manual serves as a comprehensive guide to understanding, operating, and maintaining your Millermatic 350P. It provides detailed instructions on everything from initial setup, including installation requirements for both 220/380V and 200/230/460V power inputs, to advanced techniques like utilizing the aluminum push-pull gun system.
Key features highlighted within this document include the 4-roll wire drive system, compatible with both .035 and .045 inch wire, and the electronic wire spool brake, which optimizes wire feed delivery. Users will find valuable information regarding weld cross-section analysis and a routine maintenance schedule to ensure long-lasting performance. Furthermore, hydraulic system schematics (Z60/34) and detailed parts lists are included for efficient troubleshooting and repair.
Safety Precautions and Warnings
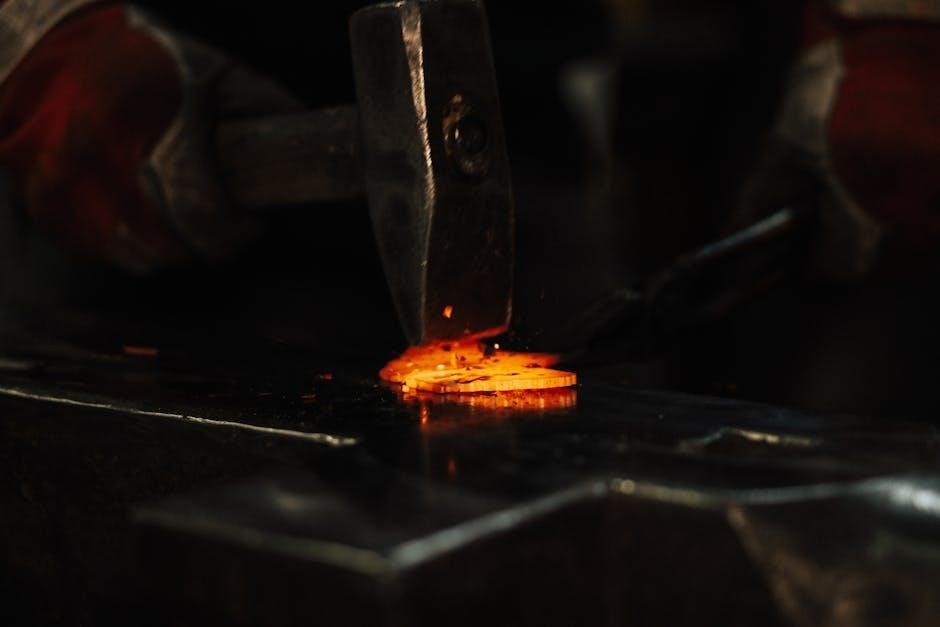
Electrical Shock Hazard: Welding processes involve high voltages and currents. Always ensure the welding machine is properly grounded and that all electrical connections are secure. Never touch electrically live parts or electrodes.
Fumes and Gases: Welding produces fumes and gases that can be hazardous to your health. Adequate ventilation is crucial; Use a respirator approved for welding fumes when working in enclosed spaces. Avoid breathing welding fumes.
Arc Radiation: The welding arc emits intense ultraviolet (UV) and infrared (IR) radiation. Protect your eyes and skin with appropriate welding helmets, gloves, and protective clothing. Never look directly at the arc without proper eye protection.
Fire and Explosion Hazard: Welding can ignite flammable materials. Remove all combustible substances from the welding area. Have a fire extinguisher readily available. Be aware of potential gas leaks in the gas supply system.
General Precautions: Disconnect power before performing maintenance. Wear appropriate personal protective equipment (PPE). Read and understand this manual thoroughly before operating the Millermatic 350P. Follow all applicable safety regulations and industry best practices.
Setting Up the Millermatic 350P
Proper setup requires correct voltage (220/380V or 200/230/460V), secure welding cable connections, and a properly configured gas supply for optimal performance.
Installation Requirements (220/380V & 200/230/460V)
Electrical installation of the Millermatic 350P necessitates careful attention to voltage requirements. This unit is adaptable, functioning on either 220/380V or 200/230/460V input, depending on the model and regional standards. Always verify your local power supply matches the welder’s specifications before connecting.
Dedicated circuits are crucial to prevent voltage drops during operation. The amperage draw is significant, demanding a circuit capable of handling the load consistently. Consult a qualified electrician to ensure proper wiring and breaker sizing. Incorrect installation can lead to damage to the welder or pose a safety hazard.
Grounding is paramount for safety. A solid earth ground connection must be established to minimize the risk of electric shock. Follow all local and national electrical codes. The manual provides detailed grounding instructions and diagrams. Failure to ground correctly voids the warranty and compromises operator safety. Proper installation ensures reliable performance and longevity of the Millermatic 350P.
Connecting the Welding Cables
Proper cable connection is vital for efficient welding and operator safety with the Millermatic 350P. Begin by ensuring the power source is switched OFF. Attach the work cable (ground clamp) to a clean, bare metal surface on the workpiece, as close to the weld area as possible. A secure connection minimizes resistance and improves arc stability.
The welding gun cable connects to the designated receptacle on the front panel. Ensure a firm, locking connection to prevent interruptions during welding. Inspect the cables for any damage – cracks, fraying, or exposed conductors – before each use. Damaged cables must be replaced immediately.
Cable length impacts performance. Excessive length can cause voltage drop and erratic arc behavior. Use the shortest practical cable length for optimal results. Regularly inspect cable connections for tightness and corrosion. Following these guidelines ensures a safe and productive welding experience with your Millermatic 350P, maximizing weld quality and minimizing potential hazards.
Gas Supply Connection and Setup
Shielding gas is crucial for protecting the weld pool from atmospheric contamination. The Millermatic 350P requires an external gas supply, typically argon or argon/CO2 mixtures, depending on the material being welded. Connect a properly sized gas regulator to the gas cylinder, ensuring it’s compatible with the gas type.
Attach the gas hose from the regulator to the gas inlet on the rear panel of the welding power source. Tighten the connection securely to prevent leaks. Before welding, purge the gas line by briefly opening the gas valve to remove any air or contaminants. Set the gas flow rate according to the material thickness and welding process – typically between 20-25 cubic feet per hour (CFH).
Regularly check the gas cylinder pressure and regulator settings. Leaks can compromise weld quality. A consistent gas flow is essential for a stable arc and a clean, strong weld. Always follow the gas supplier’s safety guidelines when handling and connecting gas cylinders to your Millermatic 350P.

Operating the Millermatic 350P
Proper operation involves understanding the control panel, adjusting wire feed speed, and setting voltage/amperage (25-400A). Utilize the electronic wire spool brake for optimal delivery.
Understanding the Control Panel
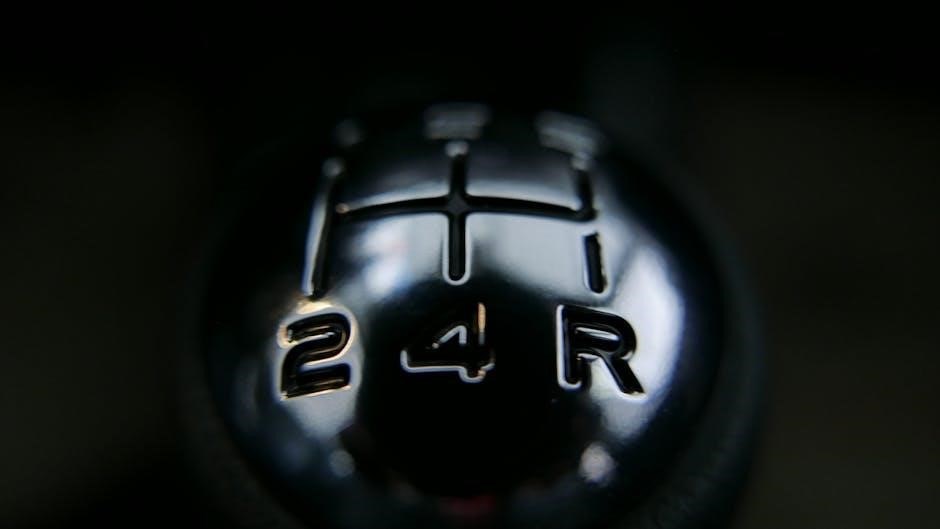
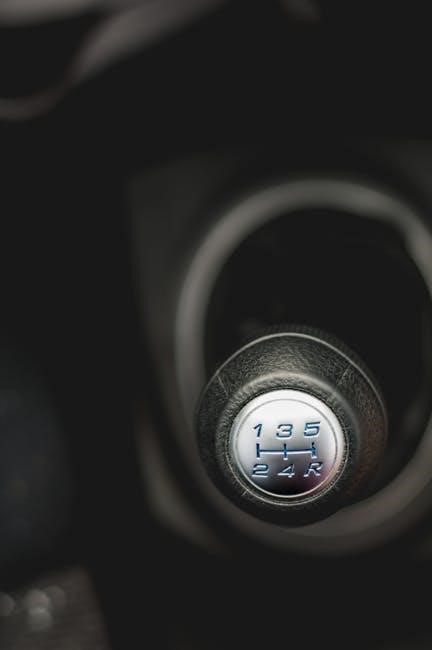
The Millermatic 350P’s control panel is central to precise welding. It features clearly labeled indicators and adjustments for key parameters. Familiarize yourself with the voltage and wire feed speed controls, essential for tailoring the weld to the material thickness and desired penetration.
Voltage control dictates the arc characteristics – higher voltage creates a flatter, wider bead, while lower voltage results in a narrower, more focused arc. Wire feed speed directly influences the amperage; faster feed equates to higher amperage and a hotter weld. The panel also incorporates settings for the electronic wire spool brake, crucial for consistent wire delivery.
Pay close attention to the amperage range, spanning from 25 to 400A, allowing versatility across various materials and thicknesses. Indicators display the selected settings, ensuring accurate operation. Understanding these controls is paramount for achieving quality welds and maximizing the machine’s capabilities. Refer to the full manual for detailed explanations of each function and its impact on the welding process. Proper adjustment ensures optimal performance and weld integrity.
Wire Feed Speed Adjustment
Adjusting the wire feed speed on the Millermatic 350P is critical for controlling amperage and weld quality. This adjustment directly impacts the amount of welding wire delivered to the arc, influencing penetration, bead profile, and overall weld strength. The control panel features a scaled adjustment, allowing for precise settings.
Higher wire feed speeds result in increased amperage, suitable for thicker materials and faster welding. Conversely, lower speeds reduce amperage, ideal for thinner materials and more controlled welds. Proper adjustment requires considering the material type, thickness, and desired weld characteristics. Experimentation and practice are key to mastering this control.
The 4-roll wire drive system ensures consistent and reliable wire feeding, even with .035 and .045 inch wire. Utilize the tension adjustments for optimal performance. Remember that wire feed speed and voltage are interconnected; adjustments to one often necessitate adjustments to the other. Consistent monitoring and fine-tuning are essential for achieving professional-quality welds. Refer to the manual’s charts for recommended settings based on material and thickness.
Voltage and Amperage Settings (25-400A)
The Millermatic 350P offers a wide amperage range, from 25 to 400 amps, accommodating various materials and thicknesses – from 22 gauge sheet metal up to ½ inch (12.7mm) steel. Voltage control is intrinsically linked to amperage, influencing arc length and weld bead characteristics. Precise settings are crucial for optimal results.
Lower amperage settings (25-150A) are suitable for thin materials, requiring less heat input to prevent burn-through. Higher amperage settings (150-400A) are necessary for thicker materials, providing the necessary penetration and fusion. Voltage adjustments fine-tune the arc, affecting bead width and profile.
Refer to the manual’s charts for recommended voltage and amperage combinations based on material type, thickness, and welding position. Experimentation is encouraged, but always start with conservative settings and gradually increase them until the desired weld is achieved. Understanding the relationship between these settings is fundamental to mastering the Millermatic 350P and producing high-quality welds consistently.
Using the Electronic Wire Spool Brake
The Millermatic 350P incorporates an electronic wire spool brake designed to optimize wire feed consistency and control. This feature is particularly beneficial when dealing with different wire types and spool sizes. When the gun trigger is released, the brake automatically engages, immediately stopping the wire feed, preventing bird nesting and ensuring a clean arc stop.
During welding, the brake allows the spool to “free spool” – meaning it offers minimal resistance – providing smooth and consistent wire delivery to the weld puddle. This is crucial for maintaining a stable arc and achieving uniform weld beads. The electronic control ensures precise braking force, adapting to varying welding parameters.
Proper adjustment of the brake tension is essential. Too much tension can hinder wire feed, while too little may result in erratic feeding. Consult the manual for specific recommendations based on the wire diameter and spool weight. Utilizing this feature effectively contributes significantly to weld quality and reduces downtime associated with wire feeding issues.
Advanced Features & Techniques
The Millermatic 350P offers advanced capabilities like an aluminum push-pull gun system and a robust 4-roll wire drive. Weld cross-section analysis aids precision and quality.

Aluminum Push-Pull Gun System
The Millermatic 350P’s aluminum push-pull gun system is specifically designed for superior aluminum welding performance. This system overcomes the challenges associated with feeding soft aluminum wire through long gun cables. Traditional MIG guns often experience bird-nesting or inconsistent feeding with aluminum.

The push-pull technology utilizes a motor in the gun itself, which pulls the wire while the machine’s feeder pushes it. This balanced approach ensures smooth, consistent wire delivery, minimizing defects and maximizing weld quality. The system is often equipped with liquid cooling to dissipate heat, allowing for higher amperage welding and extended duty cycles.
Using the correct drive rolls and tension settings is crucial for optimal performance. The push-pull gun is ideal for applications requiring precise aluminum welds, such as automotive repair, fabrication, and artistic projects. Proper setup and maintenance of the gun, including regular cleaning and inspection of the drive rolls, will ensure reliable operation and longevity.
4-Roll Wire Drive System (.035 and .045 in Wire)
The Millermatic 350P features an industrial-grade, four-roll wire drive system engineered for reliable and consistent wire feeding; This system excels at handling both .035 and .045 inch (0.9 and 1.2 mm) diameter wires, providing versatility for a wide range of welding applications and material thicknesses.
Unlike simpler two-roll systems, the four-roll design distributes the driving force across a larger surface area of the wire, resulting in improved feeding stability and reduced risk of slippage or bird-nesting. Two easily adjustable, scaled tension knobs allow for precise control over wire pressure, ensuring optimal performance with different wire types and lengths.
Quick-change, reversible drive rolls further enhance usability. These rolls can be quickly swapped to accommodate different wire diameters and are reversible for extended lifespan. This robust system is designed for demanding industrial environments, delivering consistent performance and minimizing downtime. Proper roll alignment and tension adjustment are key to maximizing the system’s effectiveness.
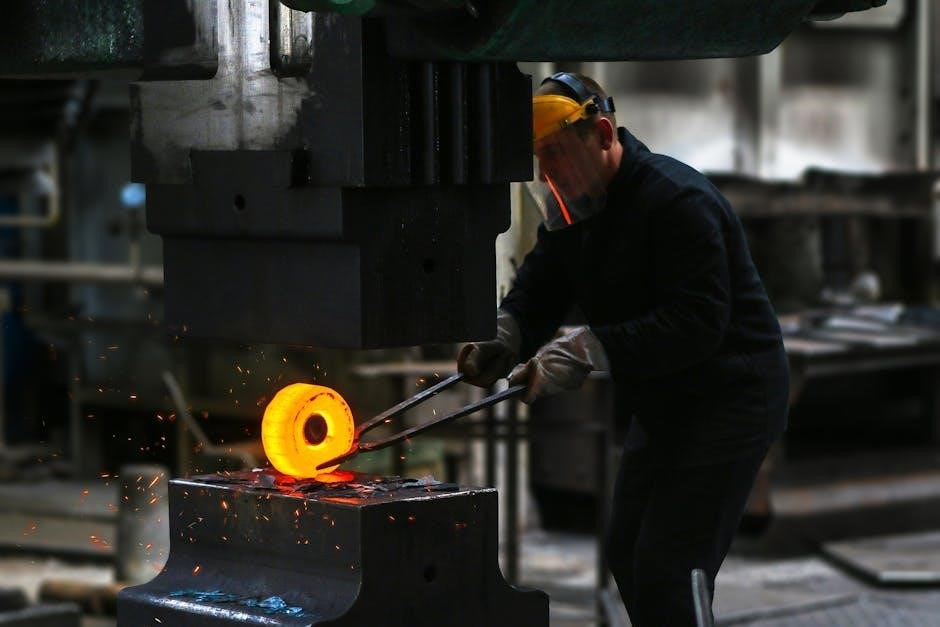
Weld Cross Section Analysis
Analyzing weld cross-sections is crucial for evaluating weld quality and identifying potential issues with parameters or technique. The Millermatic 350P’s capabilities allow for producing welds suitable for detailed cross-sectional examination, aiding in process optimization and operator training.
A properly executed weld cross-section should exhibit consistent penetration, a uniform bead profile, and minimal porosity or inclusions. Examining the heat-affected zone (HAZ) reveals the extent of metallurgical changes induced by the welding process. The width and depth of penetration are key indicators of adequate joint fusion.
Visual inspection, often supplemented by microscopic analysis, can reveal defects like cracks, undercut, or incomplete fusion. Comparing cross-sections from welds performed with different settings – voltage, amperage, wire feed speed – helps determine the optimal parameters for a specific material and joint configuration. Documenting these analyses provides valuable data for quality control and process improvement, ensuring consistently high-quality welds.
Maintenance and Troubleshooting
Regular maintenance, including following the routine schedule, ensures optimal performance. Troubleshooting guides address common issues, referencing hydraulic schematics (Z60/34) and detailed parts lists for repair.
Routine Maintenance Schedule
Consistent maintenance is crucial for the longevity and performance of your Millermatic 350P. Daily checks should include inspecting welding cables for damage, ensuring gas supply connections are secure, and verifying proper wire feed operation.
Weekly tasks involve cleaning the contact tip and nozzle to prevent buildup, checking the drive rolls for wear, and inspecting the liner for obstructions. A thorough examination of the gas diffuser is also recommended.
Monthly procedures necessitate a deeper inspection of the wire spool brake, ensuring it engages and disengages smoothly. Clean the exterior of the machine, removing any dust or debris. Check the cooling system (if applicable) for leaks or blockages.
Every six months, inspect and tighten all electrical connections. Lubricate moving parts as needed. Annually, a professional inspection is advised, including a review of the hydraulic system schematics (Z60/34) and a comprehensive parts check against the provided diagrams. Following this schedule minimizes downtime and maximizes welding efficiency.
Hydraulic System Schematics (Z60/34)
The Millermatic 350P utilizes a robust hydraulic system, detailed in schematics Z60/34, for consistent wire feeding and optimal performance. These schematics are essential for troubleshooting and repair, illustrating the precise layout of components like the hydraulic pump, motor, and associated valves.
Understanding the Z60/34 diagrams allows technicians to accurately diagnose issues related to wire feed speed, pressure fluctuations, or system failures. The schematics clearly depict fluid pathways, connection points, and component locations, facilitating efficient maintenance.
Key areas to focus on within the schematics include the reservoir, filter, and pressure relief valve. Proper hydraulic function is vital for maintaining stable arc characteristics and weld quality. Referencing these diagrams during routine maintenance, such as fluid level checks or filter replacements, ensures correct procedures are followed.
Always consult a qualified technician when performing repairs involving the hydraulic system. Incorrect servicing can lead to system damage or unsafe operating conditions. The Z60/34 schematics are a critical resource for ensuring the longevity and reliability of your Millermatic 350P.
Parts List and Diagrams
A comprehensive parts list is crucial for maintaining your Millermatic 350P, ensuring readily available replacements for worn or damaged components. This list, often found within the full manual, details every part, from the welding gun and wire feed mechanism to the power source and control panel elements.
Accompanying diagrams provide visual references for identifying parts and understanding their assembly. These exploded views simplify repairs and modifications, allowing technicians to quickly locate and replace specific components. The diagrams are particularly helpful when ordering parts, ensuring compatibility and correct fit.
The parts list typically includes part numbers, descriptions, and quantities needed for a complete machine. It may also differentiate between parts used in standard and aluminum welding configurations. Referencing this list during routine maintenance helps proactively address potential issues.
For complex repairs or when sourcing less common parts, consulting the official Miller Electric documentation is highly recommended. Accurate part identification and proper installation are essential for maintaining the safety and performance of your Millermatic 350P welding system.